
In this post, I will present a step by step procedure to deploy a Django project to shared hosting. This is one of the options that you can avail to deploy your Django project. The advantage of shared hosting is that it is cheap. The disadvantage is that you might not be able to deploy some advanced projects because you can not install a software on your shared host. You can only install python modules via pip and some modules might not function correctly on a shared hosting. If your project is a basic website or a blog, it should work just fine. I have also used shared hosting to deploy APIs made in Django using the Django Rest Framework.
At the time of updating this article, the latest version of Django is Django 4.0.4 and by using the method that I am explaining in this post, it is possible to deploy a Django 4.0.4 project on shared hosting with MySQL database.
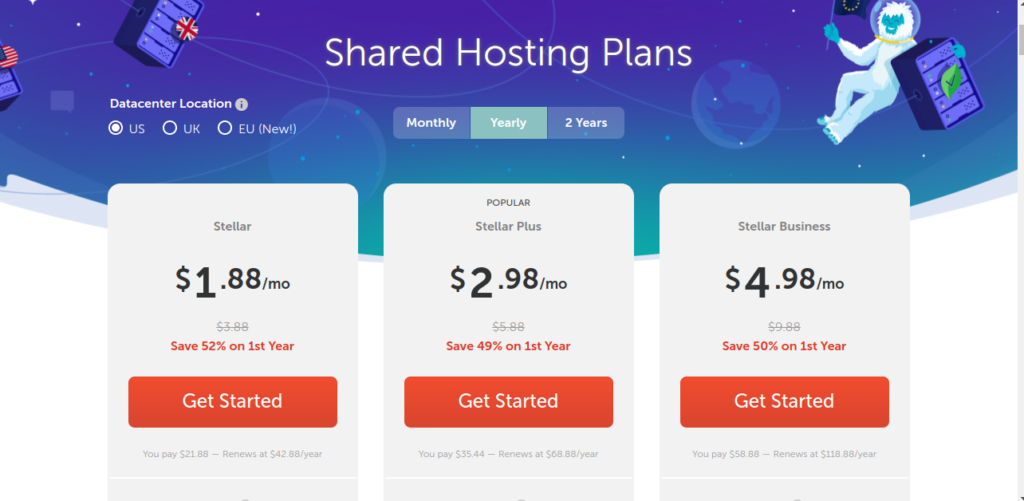
I have the Stellar Plus Plan of the NameCheap Shared Hosting which I will be using in this post.
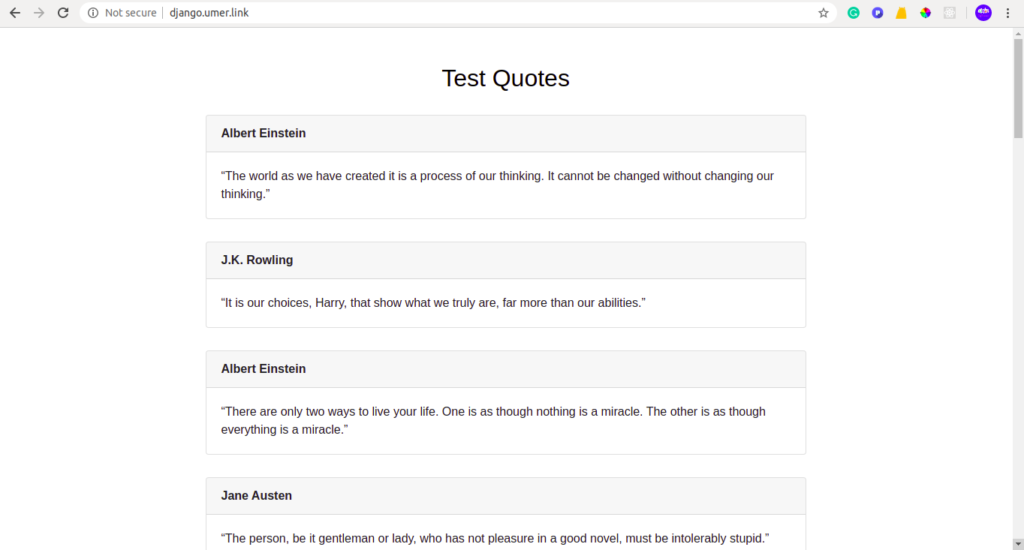
I quickly created a Django project for giving this demo. The app has quotes in the database and it just displays them. You can download the project from github. I recommend you to download this project and practice deploying it before you deploy your actual project.
Note: You do not have to delete the migrations of your project to deploy it using Cpanel unless there is a problem with the migrations.
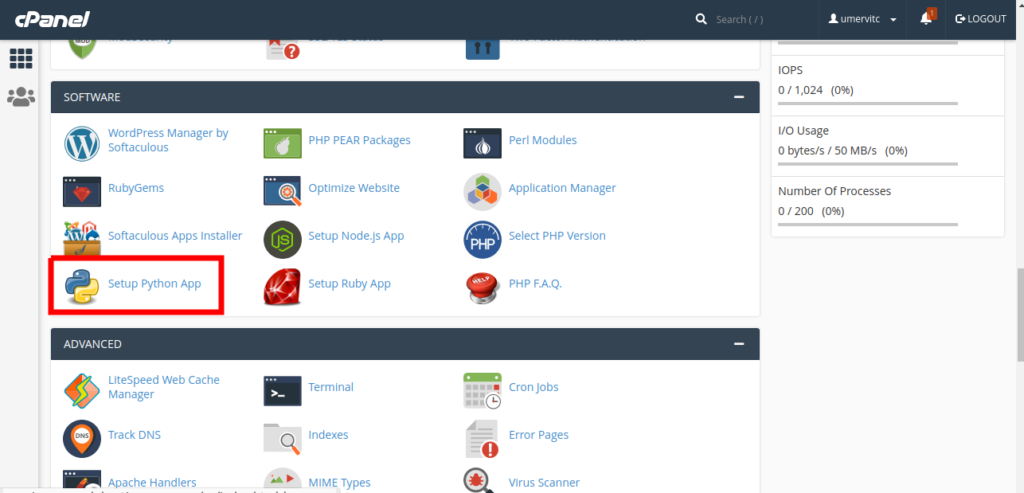
Create a Python App
Log in to CPanel and open Setup Python App.
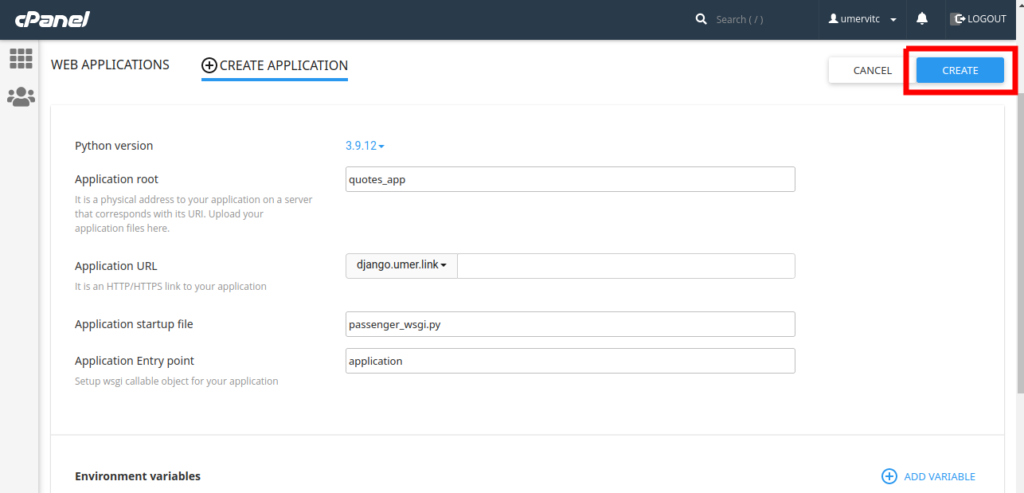
Click on Create Application
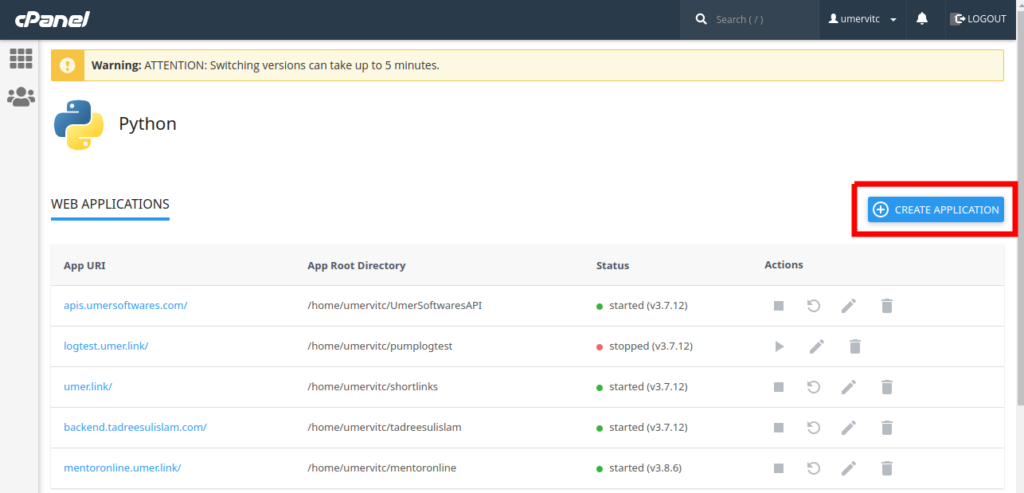
- Select Python Version 3.9.12
- Application Root is the directory where you will place the code files of your Django project. Make sure that it is a different folder than your domain root.
- Application URL is the domain or subdomain where your app will run
- In the Application Startup File, type passenger_wsgi.py
- In the Application Entry Point, type application
After setting all these, click on the Create button.
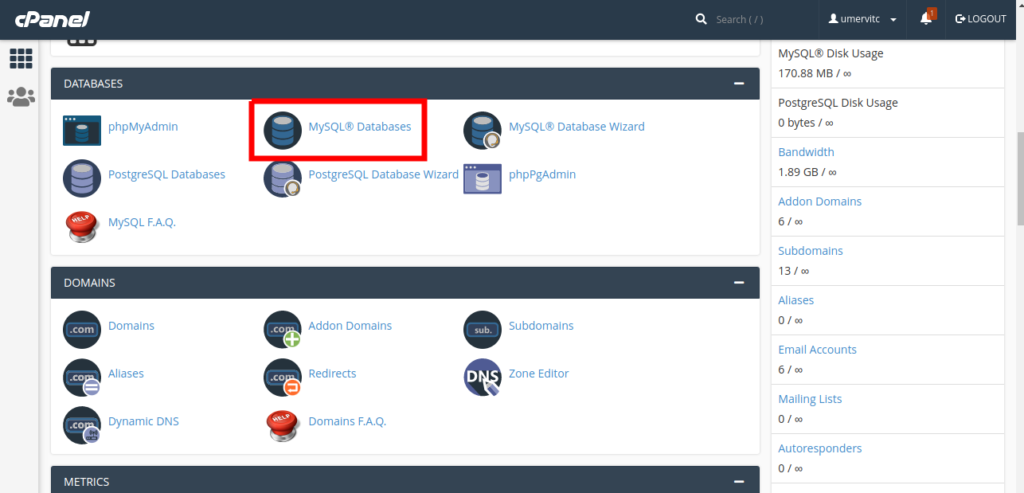
Setup the Database
Open MySQL Databases in Cpanel
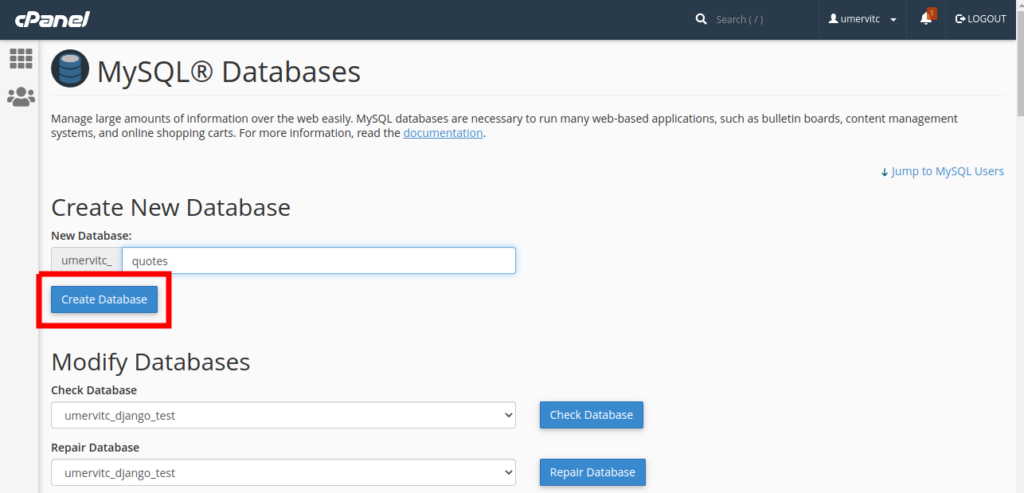
Create a new Database and note the database name. We will need it later.
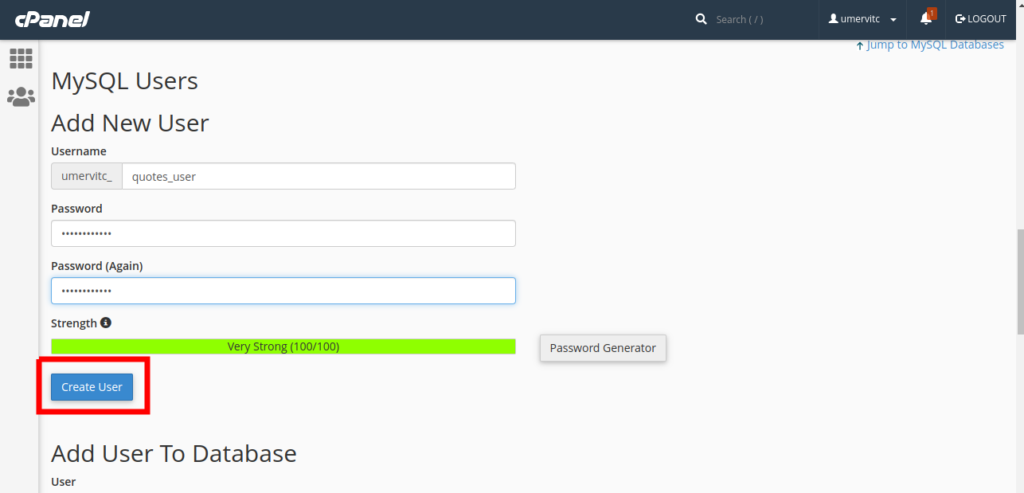
Create a new MySQL user and note the username and password. We will need it later.
Add the new user to the new Database
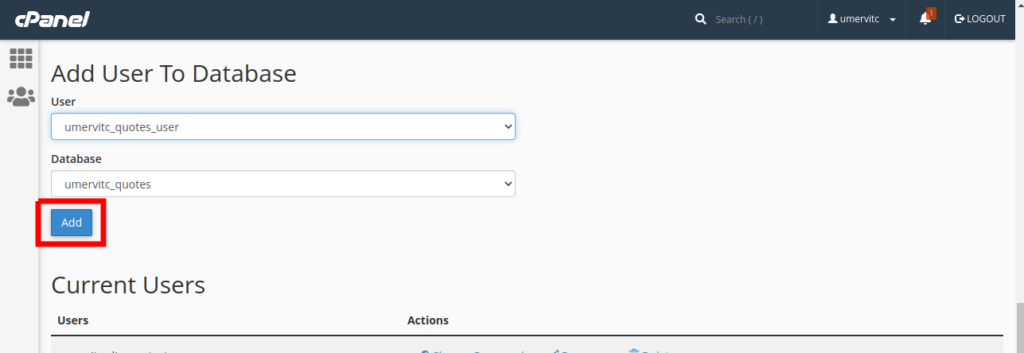
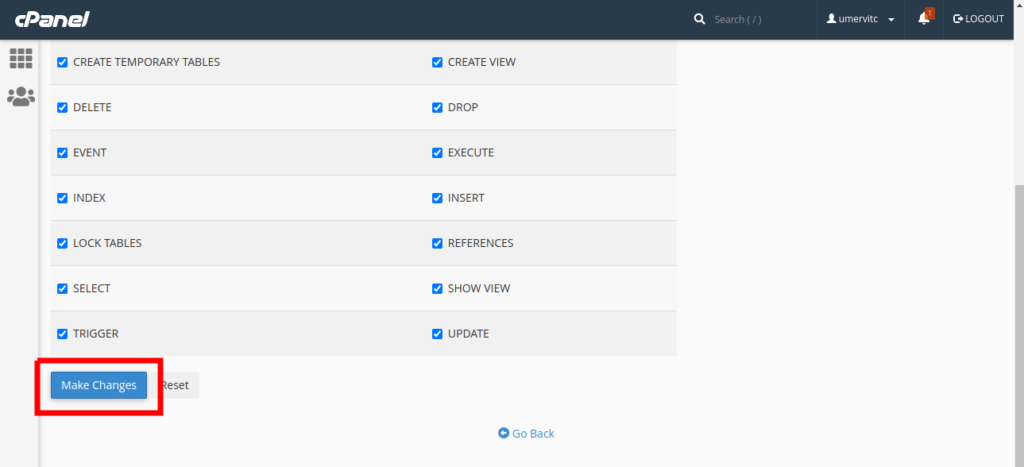
Grant all the permissions to the user and select Make Changes

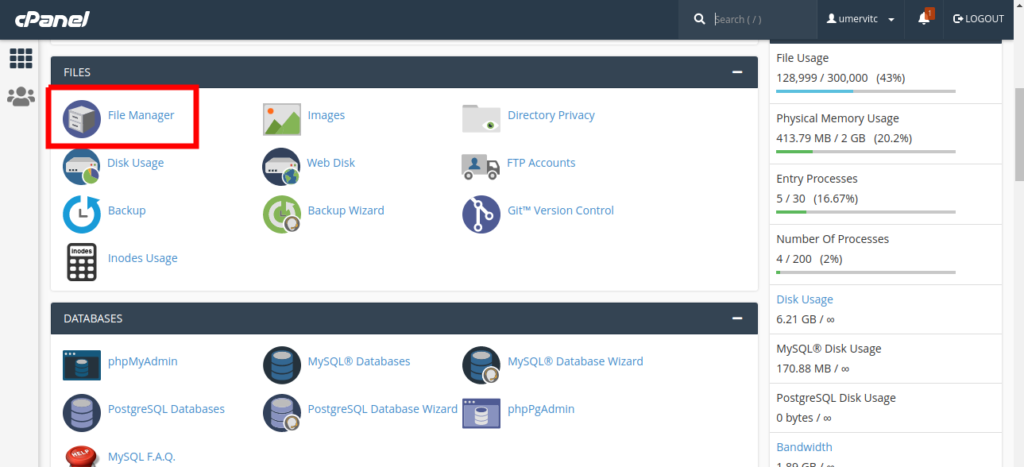
Upload your project
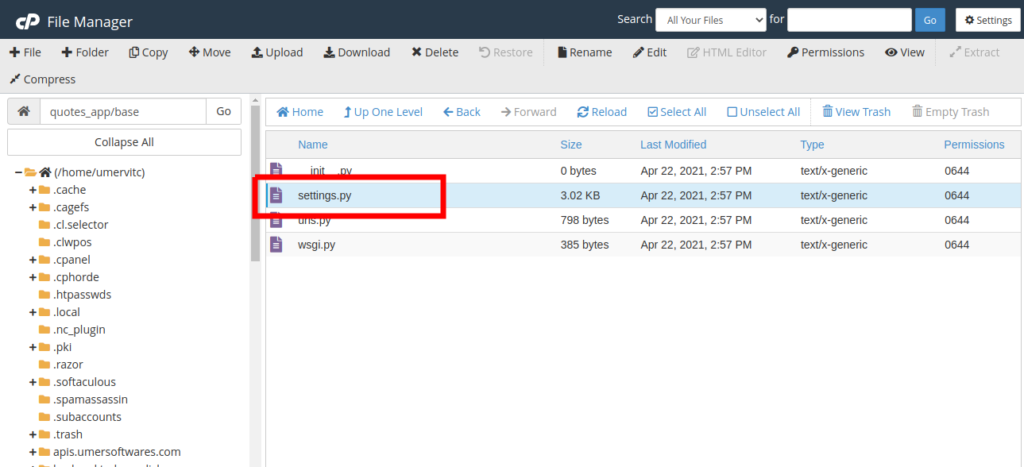
Open the File Manager and go to the Application root you specified in the part 1
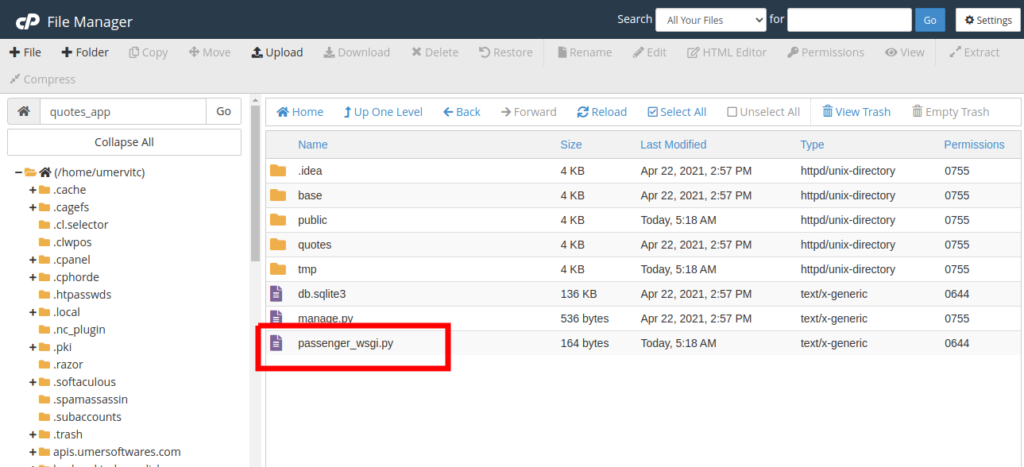
Zip your project. Upload it to this folder and extract the zip file. Your project files should be in the same folder as the passenger_wsgi.py file. Make sure that manage.py and passenger_wsgi.py are in the same folder.
Edit the passenger_wsgi.py file.
Delete everything from this file and add the following code:
from base.wsgi import applicationWhere base is your project folder. It is the same folder that contains your settings.py file. It will be different if you are not using the test project that I provided. You can locate your wsgi.py file and import application from it.
Now edit your settings.py
Add your domain to the ALLOWED_HOSTS list. If there is a www version of your domain, add that too. Do not use http:// to https://
ALLOWED_HOSTS = ['django.umer.link']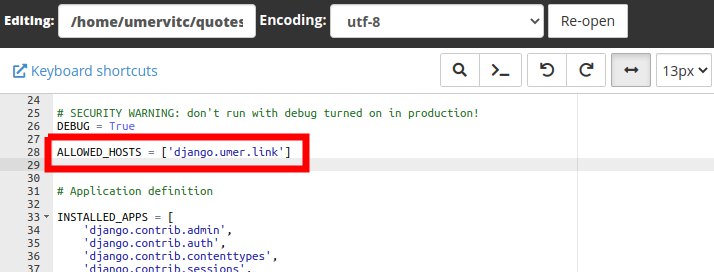
In the DATABASES dictionary, modify the default database.
 'default': {
        'ENGINE': 'django.db.backends.mysql',
        'NAME': 'databasename',
        'USER': 'databaseusername',
        'PASSWORD': 'databasepassword',
        'HOST': 'localhost',
        'PORT': '3306',
    }
Make sure to replace databasename with the database name, databaseusername with the database username and databasepassword with the database password.

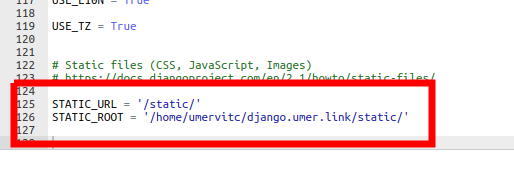
Now go to the end of the file, modify STATIC_URL and add the STATIC_ROOT
STATIC_URL = '/static/'
STATIC_ROOT = '/home/username/domainroot/static'
Replace the username with your CPanel username. The domainroot will be public_html if you are deploying on the main domain of your hosting account. If you are deploying on a subdomain or an add on domain, it will be name of the addon domain or the subdomain.
Now edit the __init__.py file
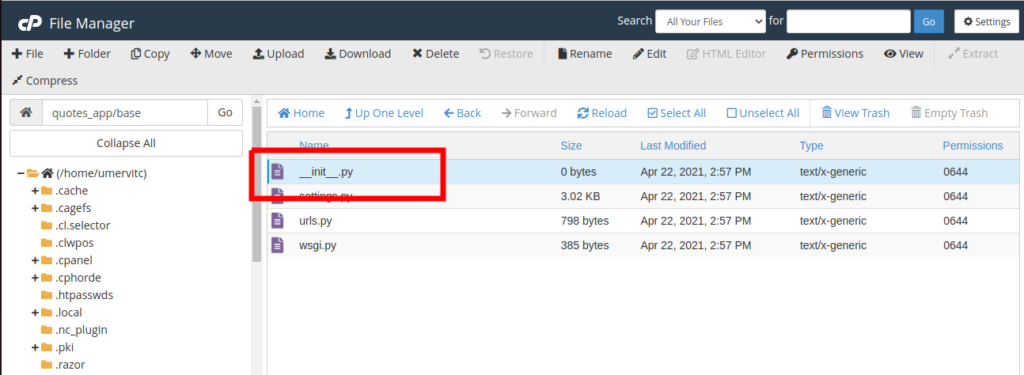
Add the following code
import pymysql

pymysql.install_as_MySQLdb()
Complete configuration from the Terminal
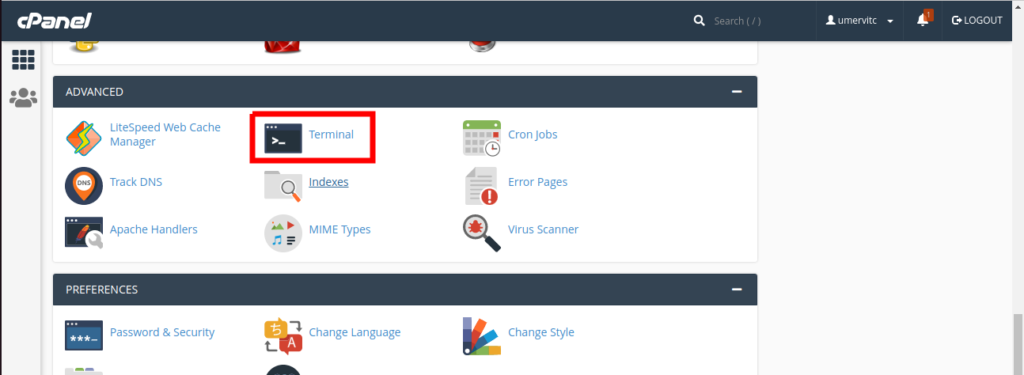
Open the Terminal in your CPanel. If you can not find the terminal, go to Manage Shell and Enable SSH Access. You can also do these steps using SSH but using the terminal is easy.
Copy the command to enter the virtual environment from your python app.
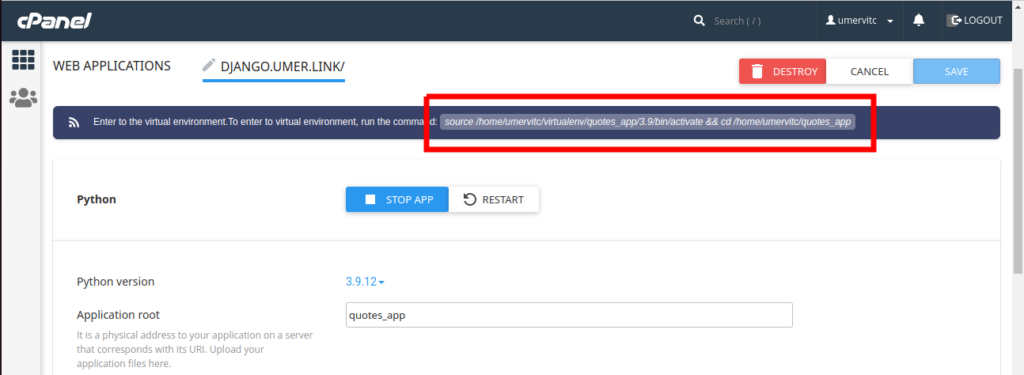
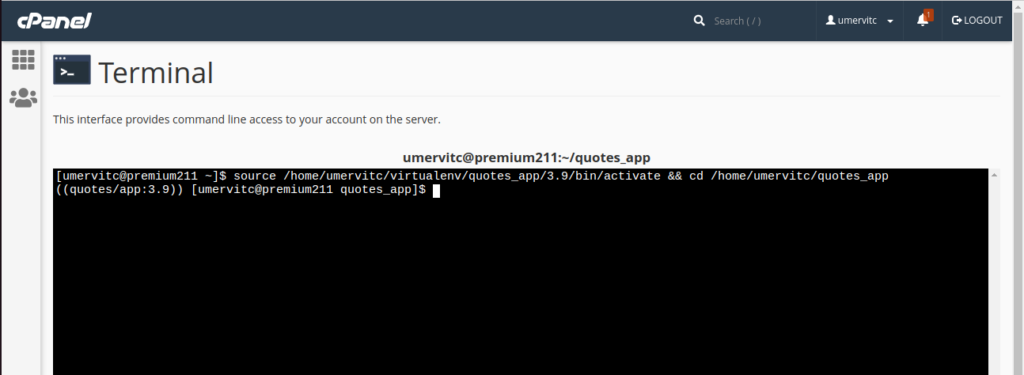
Run the copied command in the terminal and press enter to enter the virtual environment,
Install Django 4.0.4 by running the following command.
pip install django==4.0.4pymysql is required for using the MySQL database. Install it using pip. Here you will install any other modules required by your Django app.
pip install pymysqlIf your migrations are not complete, then make migrations.
python manage.py makemigrationsRun migrate to create tables in the database.
python manage.py migrateRun collectstatic to move the static files to the static root folder specified in settings.
python manage.py collectstaticRun createsuperuser to ass a user to the Django admin panel
python manage.py createsuperuserFinally, restart the python app.

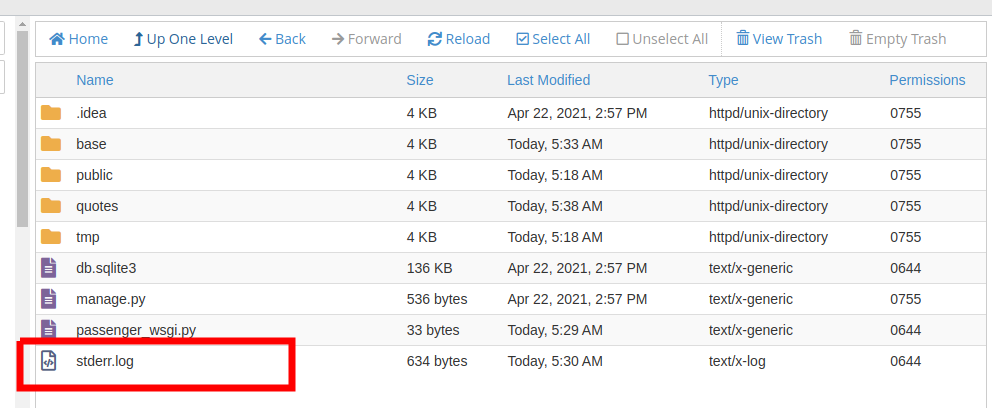
Your Django app is deployed successfully. Open the url of your app to see if it is working fine. If you see the phusion passenger error page, you can find the error in the stderr.log file for debugging.
Transfer your Database (Optional)
This part of the tutorial will be helpful if you have the app running locally or somewhere else and you want to transfer the data from the database to the one in your shared hosting. Here I will assume that you have the Django app on your computer and you want to transfer the data from the local database to the database on your shared hosting.
Run the following command on your computer to export all the data from the database to a json file.
python manage.py dumpdata>data.jsonNow upload this file to the app folder in your shared hosting.

Open the terminal in the CPanel and enter the virtual environment (steps are mentioned in the previous part of the tutorial).
First, you will clear the database by running the following command:
python manage.py flushThen run the following command to load the data from the data.json file into the database.
python manage.py loaddata data.jsonNow if you open the url, you will see that the data has been added to the database.
FAQs
Saving an imagefield gives a 404 page
See this stack overflow for the solution https://stackoverflow.com/questions/63328969/cannot-upload-media-files-on-cpanel-using-django
Useful Links
- Buy NameCheap Shared Hosting
- Use PostgreSQL database with Django on shared hosting
- Deal with media files and static files in Django on shared hosting
followed your steps but I am unable to install mysqlclient, GCC permissions denied
You can not install mysqlclient on shared hosting and there is no need to install it. The pymysql module will do the job.
True. Thanks alot i double checked to realize i did not save __init__.py.
Everything is running well but when i try to save a product with an image field i get no page found with request post here is the problem
https://stackoverflow.com/questions/62556386/page-not-found-in-the-admin-when-i-click-save-button-everything-is-okay/62674499#62674499
kindly would you help
Hi Umar, Any solution regarding the above problem of @joel?
Thanks in advance.
https://stackoverflow.com/questions/63328969/cannot-upload-media-files-on-cpanel-using-django
Here is the solution to the imagefield not working
sorry didnt save the __init__.py
hi umer i follow every step but i can’t browse simply it display this
Index of /
Name Last modified Size Description
admin/ 2020-08-11 15:02 –
img/ 2020-08-11 15:02 –
media/ 2020-08-11 09:51 –
static/ 2020-08-11 15:02 –
vilahouse/ 2020-08-11 15:02 –
Python app is not running on your domain. Either the app is stopped or you selected the wrong domain.
i did the entire process as explained but i am not able to see my application it is showing site not found. I am using Dreamhost shared server. can you please help me out on ths.
Make sure your domain is correctly connected to your hosting account.
when i ran python manage.py collectstatic i get PermissionError: [Errno 13] Permission denied: ‘/home/khamulat’. Am using a subdomain
/home/username must not be the right directory for the subdomain. This is the root of your hosting account. The correct folder might be /home/username/subdomain. If it’s not, delete your subdomain and create it again with the right folder that I have mentioned. Actually, you have to provide the path of the folder in the STATIC_ROOT in settings.py.
thanks, it worked
First of all thank you for making deploying django app on shared hosting easy.
I followed the steps you mentioned, however, at restarting the resulted in “We’re sorry, but something went wrong.” and I have no clue where to locate Error ID: fe669953 or how to fix it.
Perhaps you can comment?
Thankk
Check your logs file to see the error
I am not sure where I can locate the logs. However, I have deleted the previous app, and am presently recreating follow the steps outlined above.
In Namecheap when creating python app, there is no selection to Select Python Version 3.7.3.
In my local machine, I have python 3.9 installed. Would this make a difference?
See the last bullet point of the step “Create a python app” for setting up the logs file.
https://pythonfusion.com/deploy-django-on-shared-hosting/#0-create-a-python-app
Thanks.
The last two lines state this:
App 874814 output: RecursionError
App 874814 output: : maximum recursion depth exceeded while calling a Python object
The log file is rather long, but the last two line are as stated above.
Got it Hafiz Muhammad Umer. In passenger_wsgi, I did not replace the existing text and pasted the step I copied from above as the last line. However, in one of your another similar guidelines (https://blog.umersoftwares.com/2019/09/django-shared-hosting.html), it states to delete existing text in the passenger_wsgi file and replace it with new one. And it worked like a charm.
Thank you Hafiz, for all of this.
Howerver, on load data.json produces this error on command line:
UnicodeDecodeError: ‘utf-8’ codec can’t decode byte 0x92 in position 8086: invalid start byte
I am working on a windows machine.
Can you please suggest a workaround?
For deploying on share host need to install nginx and gunicorn. Thanks
You don’t need to install anything except for what I have explained in this post.
Thank you.
hello , i follow all your steps to deploy my django website to namecheap sharehost it work fine , i used subdomain https://msorg.celebsmag.us only home page i can access other pages showing 404
See your logs file to find the error
App 1344889 output: /opt/passenger-5.3.7-9.el6.cloudlinux/src/helper-scripts/wsgi-loader.py:26: DeprecationWarning: the imp module is deprecated in favour of importlib; see the module’s documentation for alternative uses
App 1344889 output: import sys, os, io, re, imp, threading, signal, traceback, socket, select, struct, logging, errno
App 1388505 output: /opt/passenger-5.3.7-9.el6.cloudlinux/src/helper-scripts/wsgi-loader.py:26: DeprecationWarning: the imp module is deprecated in favour of importlib; see the module’s documentation for alternative uses
App 1388505 output: import sys, os, io, re, imp, threading, signal, traceback, socket, select, struct, logging, errno
https://msorg.celebsmag.us/
Any solution to this?
no errorr log for 404 in my logs file
Is the app working fine on localhost? You can contact me at [email protected] if you want to discuss the issue with me personally.
yes it working fine on locahost and pythonanywhere server
please i really need your help cant get my connect my static files to my project
no styling and i recevice 404 with som link on my project
First, try with the sample project that I have provided so that you get a practice of deploying. Then deploy your own project. This will help you identify the issue.
Thanks a lot for the tutorial.
I would like to know if it is possible to host e-commerce project built with django’s oscar.
bro i did all steps but is show this error in passenger_wsgi.py file
File “/home/techmjiu/techpediaa/passenger_wsgi.py”, line 1, in
from blog_app.wsgi import application
ModuleNotFoundError:
No module named ‘blog_app.wsgi’
how to fix it
Instead of blog_app, you have to use the name of the folder that contains the wsgi.py file. It is the same folder that contains your settings.py.
Thank you Hafiz Muhammad!!
Worked fine following the steps.
Hello Umer, here is what it is show me [Installed 35 object(s) from 1 fixture(s)] but images and comment are not visible on the app
So I don’t understand what is problem here…
How to solve this error “Incomplete response received from application” in local host it is working correctly but in share hosting when I post an article in weblog this error is shown
Very helpful man, especially the uploading image part, i appreciate a bunch
Hi there, great tutorial!
I accidentally removed the domain folder, and when I access my domain it redirect to my main domain.
Hi Thanks for this tutorial, I deployed everything and my app login page is finally showing. But when I click on the “Login” links it tries to find the page within the wordpress server, so it shows 404 error. It isn’t looking inside the app, but outside of it the link. Can you give me any hint of what am I doing wrong?
Hello Umer,
Followed each step noted above, however, links to subpages is not working. They work on local machine though. Can you please provide a suggestion? Appreciate in advance.
Did you solve this issue?
In addition, the index page is served but the admin module is not. I cannot figure out what might have been missed. I’ve checked the log but no info there.
Hi Umer
my website hosted and working perfectly.
1 thing i want to know that how to import my db of local host into live db.
As you shared commands but my local db is in sqlite3 so php my admin wants .sql
whenever i convert my sqlite3 db into .sql format it works but gives error while opening admin panel
attribute error
guide me regarding sqlite3 db.
thanks man….
Use djangp’s dumpdata feature to export data into a json file at localhost and then use django’s loaddata feature to import data from the json file into your hosting’s database.
Hi,
thank you for this guide!
One small correction that could be made on the step where we’re editing the “passenger_wsgi.py” file.
I think that it should be made clear that you have to REPLACE all the code in that file with the provided code:
from base.wsgi import application
Otherwise the app does not work down the road 🙂
Thank you so much. Your instructions help me alot. Kindly make few updates as this article is quite old. As currently django version 3.2 is also supported by stellar plus service.
Hi Umer, Hope you are doing great I found you when I was searching regarding PHP and Django subdomain configuration I have a site in PHP which is working fine now I have build ERP system in Django which will be subdomain of PHP site on cPanel like this (www.phpsite.com/erp). This (erp.phpsite.com) is doing but I want like this (www.phpsite.com/erp) how to do this? your help will be appreciated. Thanks